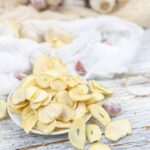
Drying Garlic From Your Harvest
Learn the simple process of drying garlic from your harvest with this easy recipe, guiding you to cure garlic bulbs for long-term storage at home. Learn how to store garlic cloves and harvest garlic in no time. By drying garlic, you can enhance its flavor, extend its shelf life, and have a convenient supply of this versatile ingredient ready for your favorite recipes.
Servings 1 Cup
Calories 45kcal
Equipment
Instructions
- The first thing to do is peel and separate the cloves from the bulb. Slice them thinly so they will dry quickly.
- If you use a round dehydrator with lots of holes, you might need a plastic insert silicone, which is a big help for laying out the garlic. Spray a small amount of olive oil onto the surface and spread it around the tray using a kitchen rubber brush. It will prevent the garlic from sticking to the dehydrator and can even add extra richness to the dried garlic.
- Spread out the garlic slices evenly on the trays with the plastic insert. Make sure to make space in between each piece for proper airflow. Set the temperature to around 160° Fahrenheit or 70° Celsius, depending on the dehydrator you are using. Dehydrate for 6-8 hours until thoroughly dried and brittle.
Video
[adthrive-in-post-video-player video-id="UIWFrkS0" upload-date="2024-01-27T14:00:00.000Z" name="Drying Garlic From Your Harvest" description="Learn the simple process of drying garlic from your harvest with this easy recipe, guiding you to cure garlic bulbs for long-term storage at home. Learn how to store garlic cloves and harvest garlic in no time. By drying garlic, you can enhance its flavor, extend its shelf life, and have a convenient supply of this versatile ingredient ready for your favorite recipes." player-type="default" override-embed="default"]
Notes
- Thin slices - Slice the garlic cloves to the same thickness as it makes them even when drying and prevents some pieces from becoming overly crispy while others are not.
- Plastic insert silicone is crucial if you often use the dehydrator as it can hold the garlic or any ingredient and will not fall from the tray.
- Salt - optionally, you can sprinkle a pinch of salt over the garlic slices before dehydrating as it can act as a natural preservative.
- Rotate trays - if your dehydrator does not have airflow, consider rotating the trays occasionally for even drying.
Nutrition
Serving: 1Tablespoon | Calories: 45kcal | Carbohydrates: 1g | Protein: 2g | Fat: 0.1g | Saturated Fat: 0.03g | Polyunsaturated Fat: 0.1g | Sodium: 5mg | Potassium: 120mg | Vitamin A: 3IU | Vitamin C: 9mg | Calcium: 54mg | Iron: 1mg