
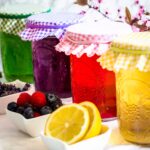
This sugar free raspberry syrup recipe gives real berry flavor to any beverage without added sweetener or preservatives that store-bought bottle syrups rely on. I use it to sweeten iced tea, add a natural berry flavor to sparkling soda, and build simple cocktails and mocktails that actually taste like raspberry. Pour it into any beverage you want to sweeten, and the deep red color and clean, raspberry syrup taste do all the work.

I keep a jar of this sugar free raspberry syrup in my fridge most weeks because it works across so many situations. Unlike commercial bottles that use many added sugars to sweeten, this syrup recipe uses stevia powder, which dissolves cleanly and lets the real berry flavor come through without any chemical aftertaste.
A Clean Sweetener Makes All The Difference
Because stevia dissolves completely into the liquid, the finished syrup stays smooth and pourable without any lumps. If you enjoy using clean sweeteners, my sugar-free condensed milk uses the same approach and is worth keeping in your fridge year-round.
More Than Just a Beverage Syrup
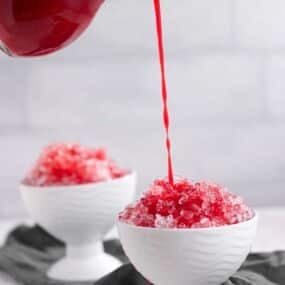
Most people think of raspberry syrup only for drinks, but this one works anywhere you need a natural flavor of concentrated berry. Pour it over crushed ice, stir it into sparkling water for a quick mocktail, or drizzle it over a slice of bundt cake for a simple dessert upgrade. One batch covers a full week of use.
A Make-Ahead Syrup That Keeps All Week
This syrup stores and freezes, which makes a double batch always worth it. If you want another make-ahead drink base to keep alongside it, my simple syrup takes the same amount of time and gives you a neutral sweetener you can flavor any way you like.

How To Make Sugar Free Raspberry Syrup
Four ingredients, a small saucepan, and fifteen minutes are all it takes to have a jar of deep red raspberry syrup ready for the week. No special equipment, no complicated technique.
Kitchen Gadgets Needed:
- Small Saucepan: Holds the raspberries and water as they simmer down into the syrup base.
- Fork or Potato Masher: Crushes the raspberries as they soften, releasing all their juice into the liquid.
- Hand Blender: Combines the mixture smoothly directly in the pot before straining.
- Fine Mesh Sieve: Strains out all the seeds for a clean, pourable syrup. Skip this if you are using the syrup in smoothies and do not mind the texture.
- Glass Jar or Bottle: Stores the finished syrup in the fridge, keeping it fresh.
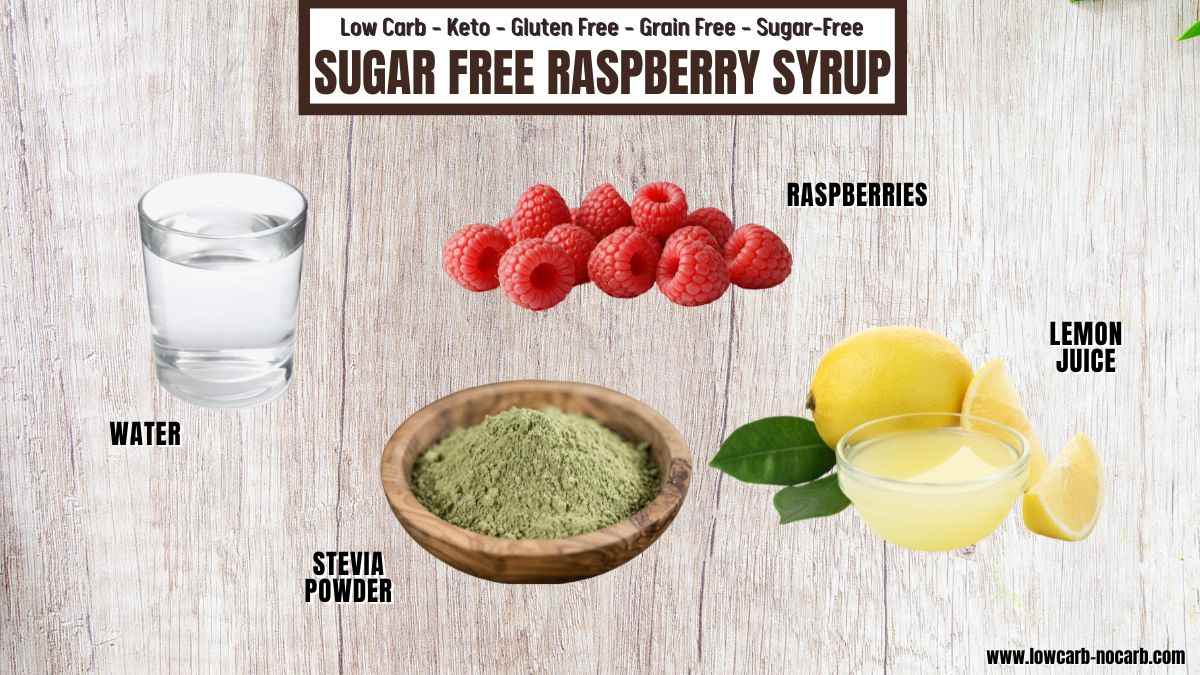
Ingredients Needed:
- Raspberries: The main ingredient is reduced into a concentrated berry liquid.
- Water: Combined with the raspberries and lemon juice to create the liquid base.
- Lemon Juice: Added to the pot before simmering to brighten the raspberry flavor and balance the sweetness of the stevia.
- Stevia Powder: Stirred into the mixture to sweeten the syrup cleanly.
*Exact measurements are listed in the recipe card below.
STEP-BY-STEP INSTRUCTIONS TO CREATE SUGAR-FREE SYRUP
First Step: Prepare Your Needs
Measure out all four ingredients and have your saucepan, fork or potato masher, and hand blender within reach before you start. If you are using frozen raspberries, set them out to thaw while you get everything else ready. Having everything set out makes the next steps go smoothly from start to finish.
Second Step: Simmer and Blend
Add the raspberries, water, lemon juice, and stevia powder into the saucepan over medium heat, crushing the berries with a fork or potato masher as they soften and release their juice. Let everything simmer for 10 minutes, stirring occasionally, until the mixture reduces slightly and deepens into a rich dark red. Turn off the heat and blitz directly in the pot with a hand blender for about a minute until completely smooth.

Third Step: Strain, Cool and Store
Pour the blended mixture through a fine mesh sieve into a bowl or jug, pressing gently with the back of a spoon to push all the liquid through. Let the syrup cool completely before pouring it over crushed ice or adding it to any cold beverage. Once cooled, transfer to a sealed glass jar and refrigerate for up to 5 to 6 days.

Zuzana’s Take and Tips:
The first time I made this sugar free syrup, I did not use stevia, and the syrup came out cloudy and gritty, no matter how long I simmered it. Switching to stevia powder fixed it completely on the next batch, because it dissolves cleanly and keeps the finished syrup smooth and pourable without any thickener.
I also tested skipping the straining step, and while it works fine for smoothies, anything poured over ice needs to go through the sieve for the right texture. Make sure to cool the syrup fully before pouring it over ice, as hot syrup melts instantly and dilutes the whole drink before you even taste it. If you enjoy making your own low-carb drinks at home, my hibiscus iced tea is the natural next recipe to try with this syrup.
- Use a fine mesh sieve rather than a regular strainer for the clearest syrup, as a regular strainer lets too many small seeds through.
- A small funnel makes pouring the cooled syrup into a glass jar much cleaner and avoids any spills.
- Label your jar with the date before refrigerating so you always know exactly how many days it has been stored.
- If the syrup thickens too much after refrigerating, stir in a teaspoon of cold water before using to loosen it back to a pourable consistency.

FREQUENTLY ASKED QUESTIONS AND ANSWERS
Substitute For Syrup Ingredients
If you do not have stevia powder, monk fruit extract powder substitutes at the same ratio. Avoid granulated sweeteners in this recipe, as they do not fully dissolve and leave a gritty finish. For the lemon juice, lime juice works as a straight swap at the same quantity. Raspberries can be swapped for any berry; the flavor and color will change, but the method stays exactly the same.
What To Serve With Raspberry Syrup?
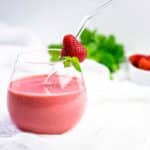
This syrup works beautifully stirred into a glass of lemonade for a quick berry lemonade that takes seconds to put together. It also makes a great topping drizzled over an ice cream sandwich when you want a simple dessert with a fresh berry finish. For a refreshing morning drink, stir a spoonful into a glass of strawberry smoothie to add an extra layer of berry flavor.
Store in a sealed glass jar in the fridge for up to 5 to 6 days. Because this syrup contains no preservatives, it will not last as long as a commercial bottle. Keep it sealed and away from strong-smelling foods for the best results.

Can I Freeze Raspberry Syrup?
Yes. Pour it into an ice cube tray and freeze for up to 2 months. Transfer the frozen cubes to a sealed freezer bag once solid. Each cube is approximately 2 tablespoons and thaws in minutes, making it easy to sweeten a single beverage without defrosting the whole batch.
More Tasty Ideas for You
If you loved making this sugar-free raspberry syrup, you will want more homemade low-carb syrups in your kitchen rotation. Chocolate syrup is another two-ingredient option that works as a drizzle over frozen desserts or as a stir into a morning coffee.
For a berry dessert that pairs beautifully with this syrup as a topping, strawberry shortcake is a natural next recipe to try. Strawberry ice cream is another great option, where a spoonful of this raspberry syrup drizzled on top takes the whole thing up a level.
Pin For Later

Need Support or have Questions? Join our Free Facebook Group.
Follow us on Pinterest, Facebook, Instagram, TikTok, Flipboard, or YouTube.
For weekly New Recipes and a FREE E-Book get into our NEWSLETTER.
Full Recipe With Print Out Option
Thank you for giving us 5 stars
Sugar Free Raspberry Syrup
Equipment
- 1 Small Saucepan
- 1 Fork or Potato Masher
- 1 Fine Mesh Sieve
- 1 Glass Jar or Bottle
Ingredients
- 1 Cup Fresh Raspberries
- 1.5 Cups Water
- 2 Tablespoons Lemon Juice
- ½ teaspoon Stevia Powder
Instructions
- Measure the ingredients and have your saucepan, masher, and blender ready; thaw frozen raspberries if using.
- Simmer raspberries, water, lemon juice, and stevia for 10 minutes while crushing the berries, then blend until smooth.
- Strain through a fine sieve, cool completely, then refrigerate in a sealed jar for up to 5–6 days.
Notes
- Use a fine mesh sieve rather than a regular strainer for the clearest syrup, as a regular strainer lets too many small seeds through.
- A small funnel makes pouring the cooled syrup into a glass jar much cleaner and avoids any spills.
- Label your jar with the date before refrigerating so you always know exactly how many days it has been stored.
- If the syrup thickens too much after refrigerating, stir in a teaspoon of cold water before using to loosen it back to a pourable consistency.
Nutrition
Disclaimer
Please note that nutrient values are estimates only. Variations can occur due to product availability and manner of food preparation. Nutrition may vary based on methods of origin, preparation, freshness of ingredients, and other factors.
If you are still looking for some Low Carb products, visit our recommended site on Amazon, which we participate in as affiliates. Just click on the image below and all will be revealed.
drink options to add syrup
Raspberry syrup pairs well with drinks that can highlight its sweet and fruity flavor. Try mixing it into lemonade, iced tea, sparkling water, mocktails, smoothies, or even hot chocolate for an easy flavor boost.


Keto Desserts E-Book

Living a Keto Lifestyle but still, have a sweet tooth?
Explore 31 Days with Top Keto & Low Carb Dessert Recipes.
All new recipes never featured anywhere else.