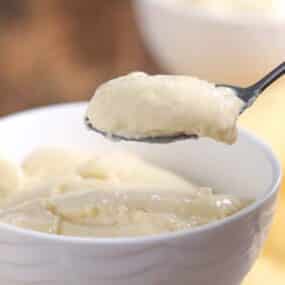
This sugar free banana pudding recipe is the dessert I reach for when I want something cold, creamy, and genuinely filling without any added sugar or compromise on flavor. It tastes like a proper banana pudding, not a sugar free substitute, and that difference is exactly why this recipe stays in my dessert list. Top it with whipped cream or a spoonful of Greek yogurt, and it holds its own as a full dessert worth making again.
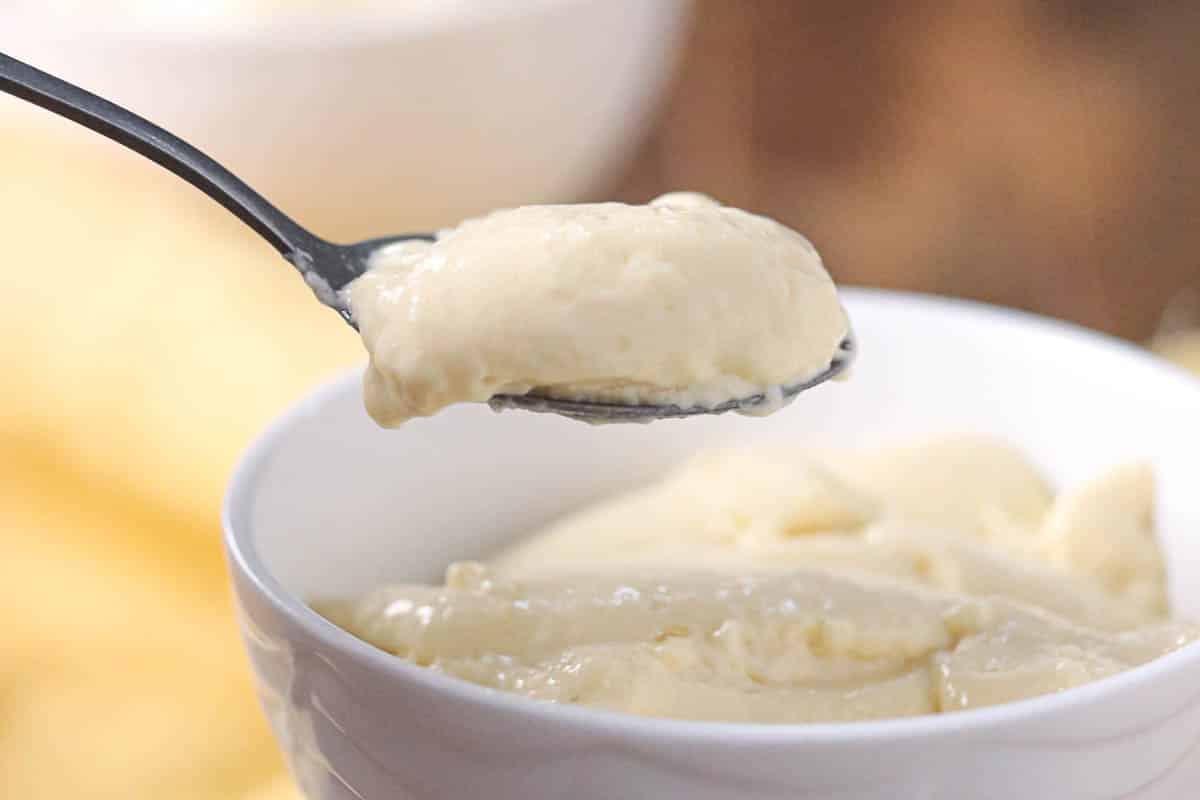
It was a Friday evening, and I had nothing planned for the weekend. I pulled out the eggs, cream, and banana, had the custard simmering in under ten minutes, and by the next morning, there was a full bowl of cold, set banana pudding waiting in the fridge. Nobody could believe it was made from scratch.
Serve It Two Ways
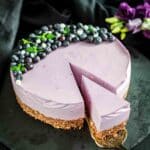
This pudding works equally well spooned into individual cups for a ready-to-grab portion or served from one large bowl at the table as a shared dessert. A dollop of whipped cream on top, right before serving, is all it needs. For another dessert that sets in the fridge and is just as easy to portion and serve, my no-bake blueberry cheesecake is worth making.
Kids Love It Too
This sugar-free banana pudding has the same creamy, sweet flavor that makes classic banana pudding a favorite, especially for the little ones. Serve it alongside a batch of homemade sugar free mini popsicles or a plate of sugar free strawberry ice cream for a dessert spread. For another frozen treat that kids reach for, my frozen watermelon dessert is just as easy to make.
How To Make Sugar Free Banana Pudding
A stovetop dessert with a simple cooking method and a few hours of chilling time is all it takes to have a bowl of creamy sugar-free banana pudding ready to serve.

Kitchen Gadgets Needed:
- Saucepan: Heats the cream, almond milk, allulose, banana, and xanthan gum together before tempering the eggs.
- Mixing Bowl: Holds the whisked eggs while you temper them with the hot liquid.
- Whisk: Beats the eggs before tempering and keeps the mixture moving on the heat to prevent it from catching on the bottom.
- Ladle or Measuring Cup: Scoops the hot liquid out of the pot to temper the eggs gradually and safely.
- Plastic Wrap: Covers the pudding surface directly during cooling to prevent a skin from forming on top.
- Large Bowl or Individual Cups: Holds the finished pudding while it chills and sets in the fridge.
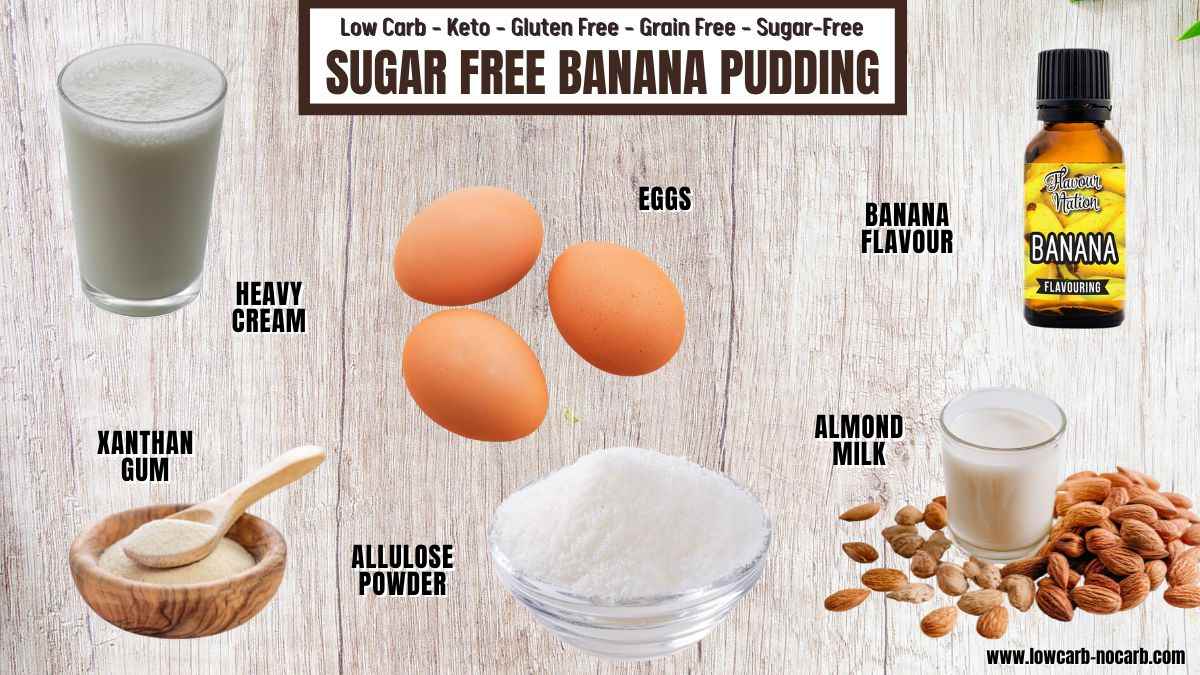
Ingredients Needed:
- Heavy Cream: Combined with the almond milk to create the rich, full-bodied liquid base.
- Almond Milk: Mixed with the heavy cream to give the pudding a lighter body.
- Allulose Powder: A sugar substitute stirred into the milk mixture to sweeten the mixture evenly, without graininess in the finished pudding.
- Banana Flavor: Banana extract is added to the other liquids to infuse the entire mixture base with a clean banana taste.
- Xanthan Gum: Whisked into the milk mixture before heating to help the mixture thicken and hold its set once chilled.
- Eggs: Whisked separately and tempered with the hot liquid before being added back to the pot to give the pudding its creamy texture.
*Exact measurements are listed in the recipe card below.
STEP-BY-STEP INSTRUCTIONS FOR CREATING KETO BANANA PUDDING DESSERT RECIPE
First Step: Prepare Your Ingredients
Crack the eggs into a mixing bowl and whisk them until smooth, then set aside within easy reach of the stove. Measure out the heavy cream, almond milk, allulose powder, banana flavor, and xanthan gum so everything is ready before you turn on the heat. Having all your ingredients prepped and your ladle or measuring cup within reach makes the tempering step go smoothly without rushing.
Second Step: Heat the Milk Mixture and Temper the Eggs
Add the heavy cream, almond milk, allulose powder, banana flavor, and xanthan gum into the saucepan, mix well, and place over high heat until the mixture comes to a boil. Turn off the heat immediately, then ladle about half a cup of the hot liquid into the whisked eggs while stirring constantly. Add another half cup and mix again to bring the egg temperature up gradually before adding the tempered eggs back into the pot.

Third Step: Cook the Custard
Turn the heat to low and add the tempered egg mixture back into the pot with the remaining hot liquid, stirring continuously with a whisk. Cook for 2 to 3 minutes over low heat, whisking constantly, until the mixture thickens slightly. Turn off the heat as soon as it reaches the right consistency, as overcooking at this stage will cause the eggs to scramble.

Fourth Step: Cool and Chill
Transfer the banana pudding mix into a large bowl or individual serving cups and press plastic wrap directly onto the surface of the pudding to prevent a skin from forming. Let it cool on the counter for 2 hours, then move it to the fridge for at least 4 hours or overnight until fully set. Once chilled, the sugar-free banana pudding is ready to serve straight from the bowl or spooned into individual cups.

Zuzana’s Take and Tips:
When I was just learning to make this, I skipped the tempering step and poured the hot liquid directly into the eggs. The result was scrambled eggs with visible cooked egg pieces throughout the pudding, and no amount of whisking could fix it. Taking the time to slowly add the hot liquid in two stages, half a cup at a time, brings the egg’s temperature up gradually and gives you a silky-smooth result. If you love making puddings and custards from scratch, I suggest my peanut butter mousse.
- Press the plastic wrap directly onto the surface of the pudding while it cools, not over the top of the bowl, to stop a thick skin from forming.
- Chill the pudding in individual portion cups rather than one large bowl if you want clean, ready-to-serve portions without any extra scooping later.
- Run a wet spatula around the inside of the pot immediately after transferring the pudding to make cleaning much easier before the custard sets on the surface.
- If the mixture looks thinner than expected after cooking, do not worry. It thickens significantly as it chills and will reach the right set consistency after the full 4 hours in the fridge.

FREQUENTLY ASKED QUESTIONS AND ANSWERS
If you do not have allulose powder, any powdered low carb sweetener works here at the same quantity. For xanthan gum, guar gum can be used at the same ratio and gives a similar thickening result. Heavy cream can be swapped for full-fat coconut milk if you prefer a dairy-free version.
What To Serve With Banana Pudding?
This pudding pairs well with regular cupcakes, chocolate cupcakes, or even meringue lemon curd cupcakes for a full dessert spread. For a light finish after a heavier meal, serve a small cup of this pudding next to a slice of pound cake for a dessert plate that covers all the bases.
How Do I Store Pudding?
Store in a sealed container or covered bowl in the fridge for up to 4 days. Keep the plastic wrap pressed directly onto the surface if storing in a bowl to maintain the smooth texture and prevent a skin from forming between servings.

Can I Freeze Puddings?
Freezing is not recommended for this pudding as the texture breaks down after thawing, and the xanthan gum loses its binding effect once frozen and defrosted. It keeps well in the fridge for up to 4 days, which makes refrigerator storage the better option for this recipe.
More Tasty Ideas for You
If you loved this sugar-free banana pudding, there are a few more recipes worth adding. Sugar-free chocolate syrup makes a great drizzle over this pudding when you want to add a chocolate layer to the banana pudding. Coconut ice cream follows the same freezer method and is just as easy to prep the night before serving.
For something in a similar creamy dessert category, strawberry shortcake is the next recipe to try when you want a layered dessert with a light, satisfying finish. All three are make-ahead friendly and store well in the fridge for several days.
Pin For Later

Need Support or have Questions? Join our Free Facebook Group.
Follow us on Pinterest, Facebook, Instagram, TikTok, Flipboard, or YouTube.
For weekly New Recipes and a FREE E-Book get into our NEWSLETTER.
Full Recipe With Print Out Option
Thank you for giving us 5 stars
Sugar Free Banana Pudding
Equipment
- 1 Saucepan
- 1 Whisk
- 1 Ladle or Measuring Cup
- 1 Large bowl or Individual Cups
Ingredients
- 1 Cup Heavy Cream 240ml
- 1 Cup Almond Milk 240ml
- 1/4 Cup Sweetener Allulose Powder
- 1 1/4 teaspoon Banana Flavour
- 1/2 teaspoon Xanthan Gum
- 3 Eggs
Instructions
- Whisk the eggs and measure the cream, almond milk, allulose, banana flavor, and xanthan gum.
- Bring the cream mixture to a boil, then slowly whisk some of the hot liquid into the eggs before returning them to the pot.
- Cook over low heat for 2–3 minutes, whisking constantly until slightly thickened.
- Transfer to a bowl or cups, cover the surface with plastic wrap, cool, then refrigerate at least 4 hours before serving.
Notes
- Press the plastic wrap directly onto the surface of the pudding while it cools, not over the top of the bowl, to stop a thick skin from forming.
- Chill the pudding in individual portion cups rather than one large bowl if you want clean, ready-to-serve portions without any extra scooping later.
- Run a wet spatula around the inside of the pot immediately after transferring the pudding to make cleaning much easier before the custard sets on the surface.
- If the mixture looks thinner than expected after cooking, do not worry. It thickens significantly as it chills and will reach the right set consistency after the full 4 hours in the fridge.
Nutrition
Disclaimer
Please note that nutrient values are estimates only. Variations can occur due to product availability and manner of food preparation. Nutrition may vary based on methods of origin, preparation, freshness of ingredients, and other factors.
If you are still looking for some Low Carb products, visit our recommended site on Amazon, which we participate in as affiliates. Just click on the image below and all will be revealed.
more desserts to make
Other desserts you can choose from offer plenty of ways to satisfy a sweet craving. Try cookies, brownies, fruit parfaits, puddings, cheesecakes, bars, or frozen treats for an easy and delicious variety.